Sprinter Van CRL Pill Window Trim Kit
Sprinter Transit CRL Pill Window Trim
Sprinter Van Pill Window Trim Kit
Adventure Van CRL Pill Window Trim Kit
Sprinter Van CRL Pill Window Trim Kit

Sprinter Van CRL Pill Window Trim

Regular price $199.00
/


Style
  • In stock - Fast and Free Shipping
  • Inventory on the way

Don't leave your pill windows looking unfinished. Our trim kit is designed to give you a polished and professional look wherever your pill windows are located.

This trim kit is designed for Sprinter vans and there's an option for both the Slider or Awning style pill windows from C.R. Laurence. The kit comes with a two piece trim kit made from Steel that's designed to trim out a single pill style window. If you have 2 pill windows, you'll need to select a quantity of 2 before checking out.

  • The Slider option is compatible with the CRL VW1033L & VW1033R
  • The Awning option is compatible with the CRL AW1033

View the Installation Guide »

Customer Reviews

Based on 12 reviews
100%
(12)
0%
(0)
0%
(0)
0%
(0)
0%
(0)
S
Stephen C.
Lovely finish

I installed these with the CRL Awning windows and they are awesome. They offered the perfect amount of flexibility during the installation and they look crisp. Because they are steel and the have no thermal break and I van camp in the snow a lot, I ordered some custom magnetic covers from www.stelletek.com with these dimensions [37.5” wide; 14.75” high; 2” corner radius]. I couldn't be happier with the result.

j
joseph k.

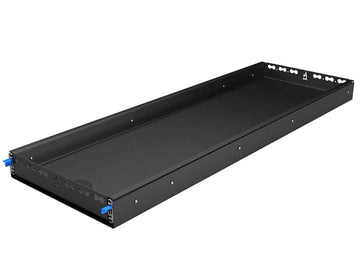
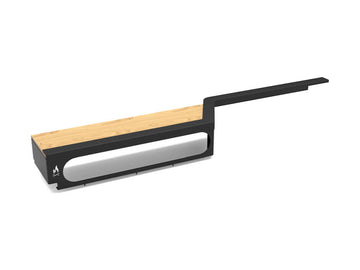
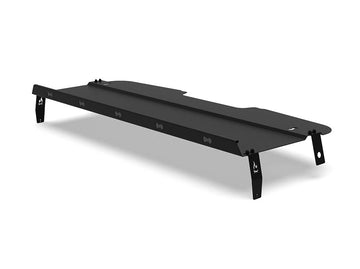
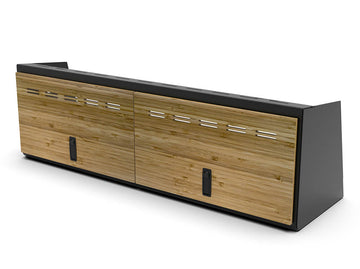
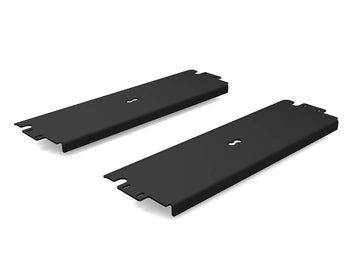
CRL Pill Window Trim - Sprinter

D
David M.
Pill window trim

As I worked on my build out, one of the issues I was concerned with WAS the trim out of Wall/Windows. Studied many different avenues to resolve, settled on this one and they look great. I highly recommend this ring and trim solution.

J
Jeff
CRL Bunk Window Trim

This trim allows a LOT of flexibility with wall thickness and construction and is the way to go! Buy and install the inner part of this trim when when you install your CRL bunk windows, since the CRL window ring holds it in place between the window ring and the van wall opening. (Also, you can make sure you cut out enough of the metal supports above and below the cutout in your Sprinter walls.) There are 4 screws that attach the outer part of this trim to the inner part. I wish they were not so easy to cross-thread during the inevitable put it in, take it out, put it in, take it out process of building van wall panels. This is a great product that looks professional after the last "put it in". Even though this is a trim product... buy it early in the build!

Hey Jeff,

Thanks so much for the generous and detailed review - we really appreciate it and the support! Please let us know if you need anything moving forward. You can email support@flatlinevanco.com and we are happy to help however we can!

E
Eugene A.
Look great and make window install much quicker

Great fit and finish!

Thanks so much for the kind review and feedback- let us know if you need anything moving forward!

C
Craig I.
If you're not using FVC walls

If you're not using FVC walls there may be some modifications required. My walls are thin as I did not do any furring strips. Instead my walls are 1/2" bamboo panels that go right up again the metal and held in place with plusnuts. Due to this I had to make 1/2 spacers to increase the overall depth of the wall around the window. These spacers fit between the bamboo panel and the outer trim ring from FVC. It doesn't look bad so I'm happy with it and doing it this way was easier than actually making my own trim rings.

The actual inner trim rings from FVC do not fit exactly around the windows I purchased (CRL VW1033L and AW1033) they basically do not make full contact to the actual van wall. Luckily I planned to use butyl tape as a means to minimize rattling from metal on metal contact. Once everything thing was put together you don't really notice what I did - despite me not being an expert woodworker.

Product improvement suggestions would be:
1. Offer an aluminum or non-metal option. (With places to put in concealed magnets for window coverings).
2. Provide an easier method to trim the rings for shallower walls. (The inner ring threaded nut is to far out, maybe a second one so when trimming it you have another spot to screw into)

Final rating is I would suggest using these trim rings because I value my time more than trying to figure out how to make these by hand and they look good.

Thanks, Craig! They do work great with the AdWag walls (we don't make any ourselves) and they're made to work with a wide variety of walls since we know everyone's walls won't be the same. This does mean that some may need to make slight modifications, but this is great feedback for our product team to hear. We appreciate you taking the time to review and share this feedback, and we're glad you’re ultimately happy with the look!

You may also like: